I love making interactive / adapted books for my students! By giving students something tangible to interact with on each page, you promote engagement and can check for comprehension through out the story.

Interactive / Adapted Books also give students a clear purpose for reading books if they don't see the value in reading yet. You can adapt the current books you have in your classroom by adding symbols or you can print and create your own books! Here's the steps I go through when putting together adapted books that I have printed.
(I've added amazon affiliate links below for your convenience. If you choose to purchase through these links, it costs the same for you and I will receive a small percentage of the sale) 
Next, you will need to punch holes in order to bind your book together! You can use a hole punch and binder rings OR you can use a binding machine like the ProClick below.

You just have to slide the top across and, boom, you have a beautiful line of holes :)

Next, insert a spiral coil through the holes. I like to keep everything together by clipping the pages together with a binder clip so that the holes don't move around.

Just cut off the extra coil with a normal scissors.

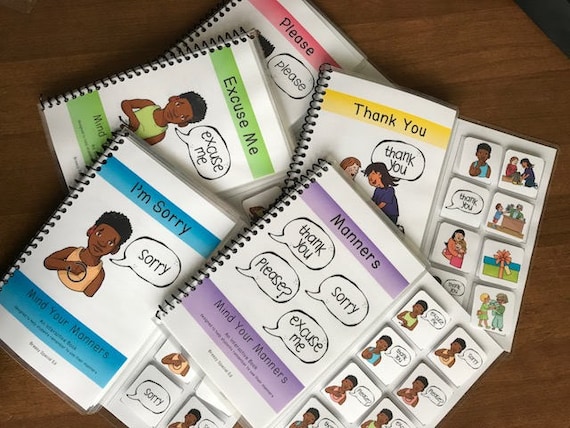
Then, add Velcro to the appropriate spaces in the book. Make sure you use opposite Velcro pieces to the book pages and the backs of the pieces. For this book I used hard Velcro on the pages and soft Velcro on the pieces. I did it this way because the hard Velcro is clearer, and this way students can match the pieces to the bottom page if they are matching to the same picture, instead of the page on the book.

And there you have it, a beautifully binded adapted / interactive book!

Check out this Facebook Live video to see how I put together an adapted book in real life! :)
Looking for some adapted books? Grab these recipes books (as shown) here, these community sign books here, and check out all of my adapted books here in my TpT store!


I appreciate you posting how you put together your books. I will pin this for later too so that I can refer to it later. The extra adapted real books are a good example too. I only recently have gotten a spiral book binder, I found one at the Goodwill. What I have been using to bind my books is zip ties. My students tend to stem by open and closing the binder clips, and they are expensive. You can buy 100 zip ties at Harbor Freight for $2. My next step is to buy some spiral binder pieces and give that a go. Happy Laminating! Thank you again!
ReplyDeleteZip ties! That is so smart! I totally should've done that before I got my spiral binder. Thanks for commenting and sharing that idea! :)
DeleteThank you Jessica! I have a book that needs binding and I have zip ties! problem solved
DeleteThank you for these tips! I really like the binder clip idea for assembly - genius!!
ReplyDeleteHow can I buy this book?
ReplyDeleteHere's the set with the smoothie book: https://www.teacherspayteachers.com/Product/Visual-Recipes-for-Milkshakes-and-Smoothies-Cooking-Lessons-2697987
DeleteOr here's the bundle! https://www.teacherspayteachers.com/Product/Interactive-Cooking-Visual-Recipes-BUNDLE-for-special-education-2538638